If you love Reese's peanut butter cups, you will LOVE this cheesecake! And the best part?? It's made with simple, whole-food ingredients (no gluten, dairy or refined sugar!) Yay for healthy desserts! Jump to Recipe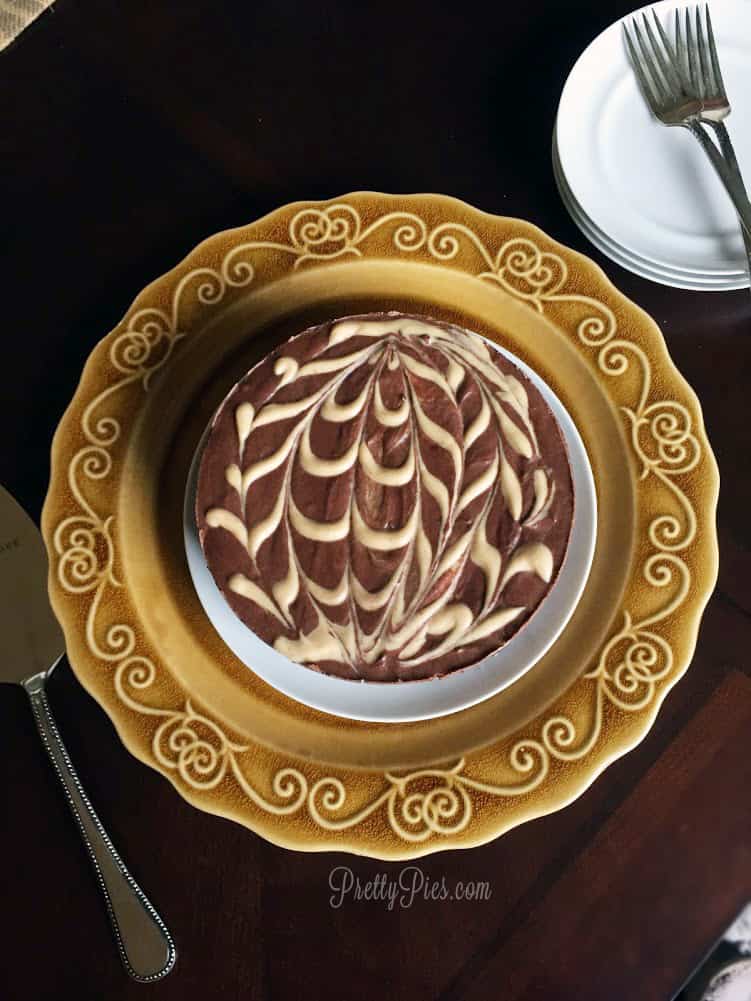
Wholesome, Simple Ingredients!
Who else is absolutely obsessed with peanut butter? (I confess!) The only thing better than peanut butter is adding chocolate. I love cheesecake and I love Reese's but not the refined sugar or dairy.
Here's an amazingly dairy-free, refined sugar-free, cheesecake flavored like a peanut butter cup!
The entire recipe uses only ten (real) foods. None of the junky chemical stuff or trans fat found in Reese's.
And it's easy to make. Promise! No-baking (Waiting for it to set is the hardest part! ... BUT you can totally lick the mixing bowl clean! lol that's what I always do! Can't resist.)
Easy, No-Bake Recipe
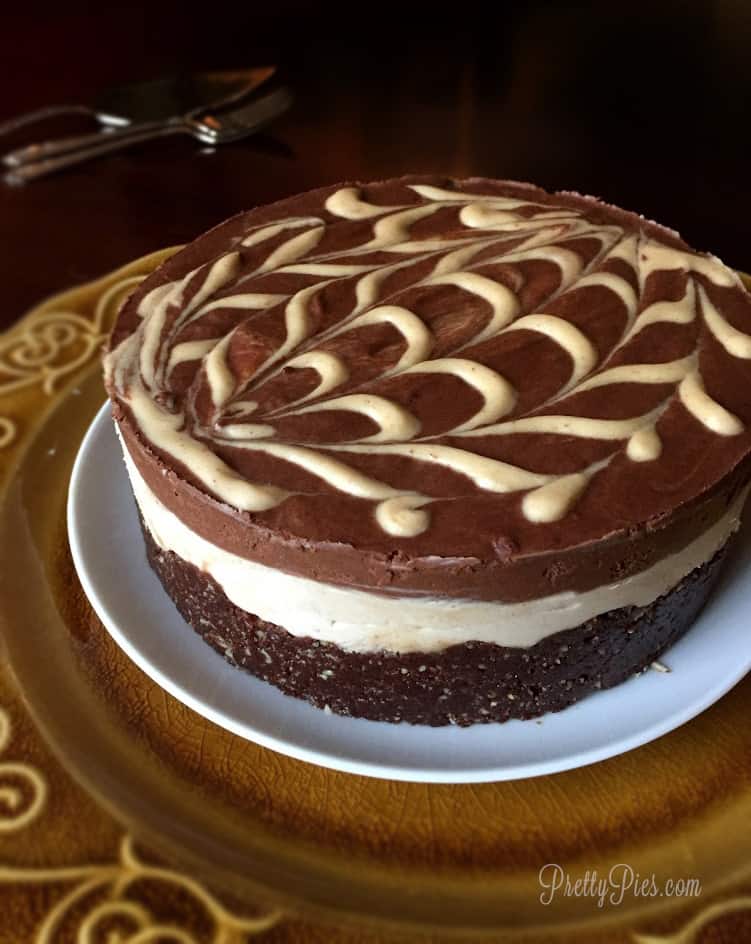
The crust is a chewy, NO-BAKE chocolate cookie made with nuts, dates and cacao (so it's grain-free & gluten-free!) Just pulse together the ingredients in a food processor and press into your pan. Literally takes less than 5 minutes. Easy.
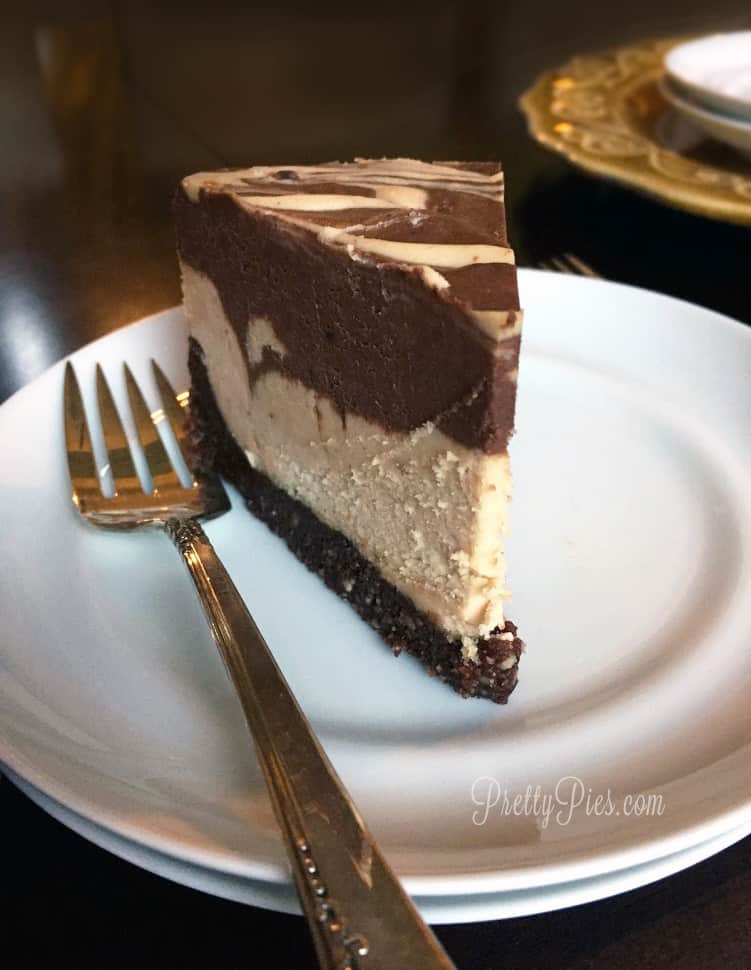
The middle layer is a thick layer of peanut buttery, creamy cheesecake yummyness. (But unlike traditional cheesecakes, this one is dairy-free, egg-free and refined-sugar free!) It has just a few simple ingredients: peanut butter, maple syrup and coconut.
To me it tastes like both a cheesecake and a pie... a chi? Piecake? Haha, whatever you want to call it, it's SO good!
A Giant Peanut Butter Cup
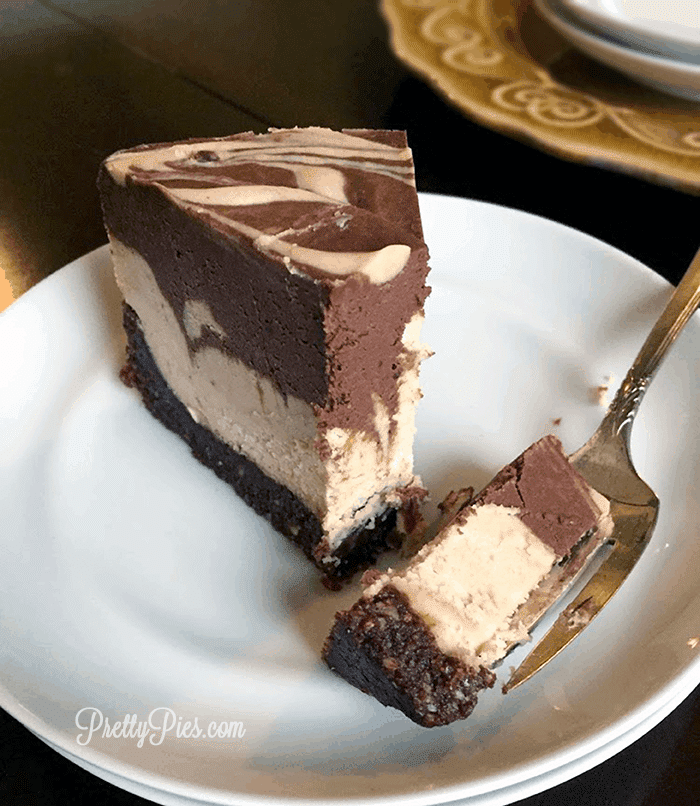
The top layer is made by simply adding in some melted chocolate and a bit more cacao to the peanut butter cream. So now it's a basically a giant peanut butter cup! Heck YES. But you won't feel sick to your stomach after eating it! No sugar bombs here. The fiber, protein and healthy fats slow the absorption of glucose into your bloodstream to prevent spikes in your blood sugar, crashes and post-consumption cravings. #winning
I marbled the layers a little bit by poking and swirling the top of the cake with a knife before it was set. So each piece I cut had a different pattern inside. Pretty! 🙂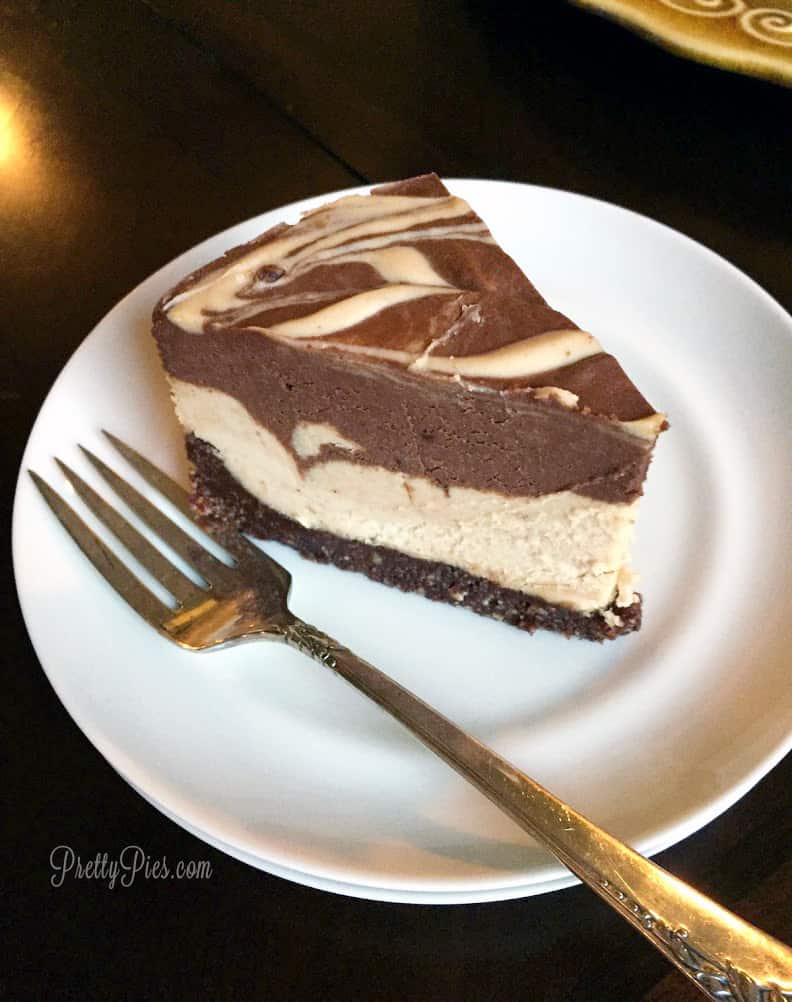
The BEST Natural Peanut Butter
Save a few spoonfuls of the peanut butter cream to swirl on top (to make it pretty, of course!) and to add more peanut butter deliciousness!
Side note: my favorite peanut butter is from Aldi! Do you shop there? They have really amped up their organic and natural foods selection and I am quite impressed! A jar of Simply Nature organic peanut butter is only $3.89 per jar! Score!! AND it's JUST peanuts and salt! NO oils, sugar, preservatives or other stuff I don't want in my pb. The flavor and texture are perrrrfect.
Want more Reese's Recipes?
Can you ever have too much peanut butter and chocolate? No. The answer is no 😉
You'll also love these:
and Reese's Crunch Bars! (No cooking involved!)
Now, on to the recipe!
Click the image below to Save this recipe on Pinterest: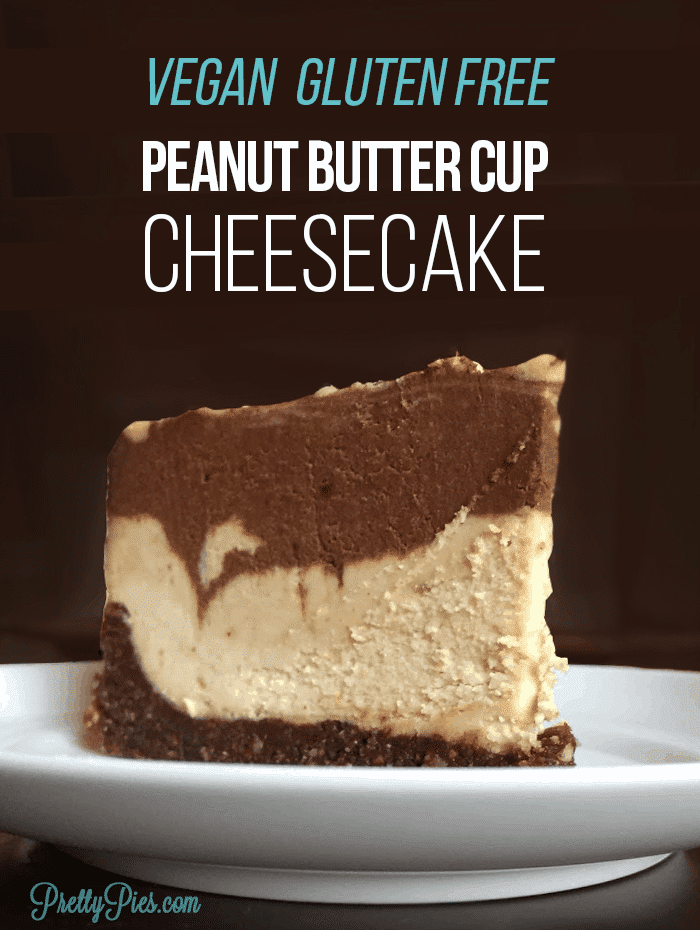
Peanut Butter Cup Cheesecake {Vegan, GF}
Ingredients
Chocolate Crust
- 1 ¼ cup almonds
- 1 cup medjool dates
- 2 ½ Tbs raw cacao powder
- Dash of salt
- Splash of water
Peanut Butter Cream Layer
- 2 13oz cans coconut milk - solid cream only
- ½ cup peanut butter - heaping
- 7.33 Tbs pure maple syrup - (⅓ cup + 2 Tbs)
- 9 Tbs coconut oil - (½ cup + 1 Tbs)
- 1 Tbs vanilla
Additional ingredients for Chocolate Layer
- ⅓ cup chocolate chips - I used Enjoy Life
- 1 Tbs raw cacao powder
Instructions
To make the crust:
- Pulse the ingredients together in a food processor. Press into a parchment-lined 7" springform pan.
To make the peanut butter layer:
- Scoop out the solid cream from 2 cans of coconut milk (refrigerated overnight to separate the cream). Add the cream to a large mixing bowl and whip until light and fluffy.
- In a saucepan, melt together the remaining ingredients on medium heat and whisk smooth.
- Fold pb mixture into the whipped cream.
- Spread ¾ of the pb cream onto the crust. (Reserve 2-3 spoonfuls in a baggie for the topping). Freeze until set while you prepare the chocolate layer.
To make the chocolate layer:
- Melt chocolate chips using a double boiler (or glass bowl set on a pot of boiling water)
- Stir melted chocolate and cacao into the remaining pb cream.
- Pour chocolate layer on top of pb layer. (Optional: swirl layers with a knife. Snip off corner of baggie and pipe on reserved cream to decorate)
- Refrigerate cake about 4 hours, or until completely solid. Enjoy!
Erica
This looks incredible! My stomach can't handle coconut cream (weird, I know), do you know what I could sub the coconut cream for? Regular whipping cream? Cream cheese? TIA!
Emily
Thanks Erica!
Hmmm... I would probably use cream cheese, or maybe 3/4 part cream cheese and 1/4 whipping cream (whipped)
If you try it, please let me know how it turns out 🙂 Hope you enjoy!
Teresa
I'm excited to try this, although I don't have a spring form pan . If I use a regular glass pie dish will this still work?
Emily
Hi! Yes it should work, but it will be flat— probably more like a pb cup 🙂 just line your pie plate with parchment for easy removal. Hope you enjoy!
Tiffany
How many calories are there?
Emily
I m sorry I don’t have the nutrition facts for this one, but you can use an app like Cronometer or Myfitnesspal to calculate it 🙂
Renee
Hi Emily,
How does the cream on top of the can of coconut milk compare to a can of coconut cream from Trader Joe's in terms of adhering to the recipe? I assume the amounts aren't equal.
Thanks so much! I can't wait to try this! 🙂
Emily
Renee, I think the amounts of cream are the same. Let me know how it turns out!
meggan
this looks AMAZING ... but how much, in volume cream are we going for? i want to get the right consistency and quantity and not all "cans of coconut milk" are equal in terms of size and cream and whatnot =) thanks!
Emily
Meggan, I would say it's 1 1/4 cups of cream. A little more or less cream won't hurt 😉
Meggan
groovy thanks =)
Gwen T
Hi Emily, This looks amazing! I can't wait to try. I'm not a big fan with coconut oil. Is there something you recommend fora sub? Thank you!
Emily
Thanks, Gwen! There is no clear sub that I know of. The coconut oil solidifies when chilled and holds the cheesecake together . I cannot taste any coconut flavor in this since the peanut butter and chocolate have such strong flavors.
But if you really want no hint of coconut flavor, you can use refined coconut oil which does not have a coconut flavor. Hope that helps!
Sananda
I've made a few of Emily's pies without any oil and hardly noticed a difference!
Marta
Could you use almond butter in place of peanut butter for this recipe? Or omit the peanut butter altogether and use more coconut cream?
Emily
Definitely almond butter! And some almond extract would be a great addition with it! Yum
Diane
I am wondering how you can get thick of a top chocolate layer with only 1/3 cup chocolate chips. Is there something missing from the ingredient list?
Emily
Sorry if my instructions were unclear. If you look at step 4, you only use 3/4 of the pb cream. The remaining 1/4 is used in the top layer (Stir melted chocolate and cacao into the remaining pb cream.)
Make sense? 🙂
Keren
Hi Emily! your cakes look so good I can't wait to try one!
I have a few questions:
- If I don't have time to cool the coconut milk, can I use it as is? or can I put it in the freezer?
- The almonds should stay with their peel?
Thank you so much!
Emily
Thanks, Keren!
For the coconut milk, you can buy cans of just coconut cream only (http://amzn.to/2BI27D3) so you don't have to wait for them to separate.
The freezer option would not really accelerate the separation process - I think it would just all freeze together.
But if your house is cold, the cream may already be separated, especially in winter. Mine has been lately! So you can open a can and check. If it's not separated enough, chill it for a few more hours.
Yes the almonds stay as is 🙂
Hope that helps!
Erica
Hi! This turned out to be a big pan of soup. The chocolate layer went right through the pb layer. Any idea what went wrong?
Emily
Oh no! That is so strange! I'm sorry did you use solid coconut cream (separated from the liquid)? Did you add coconut oil ? That's what solidifies it. Any changes to the recipe?
Julie haus
I made this as well and ended up with a soupy mess. And yes I separated the cream on top of the coconut milk. The other thing is, mine tastes a lot like coconut. Kinda Leary at this point and waiting to see what happens after it's in frig for a bit.
Emily
It is a liquid before it goes in the freezer to firm up. The coconut oil hardens it. It could take several hours depending on how cold your fridge is. I hope it still turned out for you.
Bronwyn
Would it be okay to substitute the maple syrup with actual white sugar? Also is there another type of oil that could be used instead of the coconut.
Thanks so much!
Emily
I'm not sure if the sugar would work. It would be too gritty.
Powdered sugar might work ok, but it makes it more dense.
Side note - You can blend sugar in a small blender for 20 seconds to make powdered sugar.
Also, you would possibly need double the amount since maple syrup is twice as sweet as sugar.
For the oil, you can sub palm oil.
It needs to be an oil that solidifies when chilled (that's what holds it together so it's not a bowl of chocolate soup )
Hope that helps!
Bronwyn
Thanks so much, can't wait to try it out!
Dana
Hi Emily, thanks so much for this amazing recipe, I made it a couple of times previously and everybody loved it!
Would it also work with unrefined cane sugar instead of maple syrup?
Thanks!
Dana
Emily
I’m so glad you loved it To use sugar, you would need to change it into a syrup to by dissolving in hot water in a 2:1 ratio. Maple syrup is twice as sweet as sugar 🙂 also you don’t want the grit of sugar in your cake. Hope that helps!
Dana
The cake was absolutely amazing and so easy to make! Thanks a lot!
Emily
Yay!! So happy to hear that. You are very welcome 🙂
Emily
It came out brilliant. Thank you. We used dark choc over 70% instead of choc chips and it was yummy. Would love to hear if anyone made it with almond butter instead and how it tasted.
Emily
Awesome! You are welcome!
I still want to try this with almond butter and almond extract (I looove almond flavor!) I bet it would be delicious
Sara
Hi! I actually made this for Easter and it was perfect and delicious. My non GF peeps and meat eaters had no clue 🙂
I made it again but my cream didn’t set up properly in the can... I had soaked some cashews the night before and used those with some of the coconut cream that was salvageable.. blended together and also turned out great! Thanks so much 🙂
Emily
Oh yay! Don’t you love when they can’t tell it’s GF/V??
Glad you were able to save the second one! Cashew cream is perfect
you are so welcome!
Teresa
I can’t have almonds. What can I substitute in the crust?
Emily
Any nut you like will work. I would do walnuts 🙂
sj
This recipe was soooo good. My family could not get enough. I missed the directions about mixing the chocolate into the PB mixture so mine came out with a hard chocolate shell on top. Ooops. It was still great though.
Emily
Glad you liked it! Thanks so much for taking the time to leave a comment
Iulia
1 Tbs means 1 tablespoon and 2T means 2 teaspoons? Can you please make the ingredient list also in grams?
Also for me is unclear how much peanut butter do I have to use. For first layer after the crust says 1/2 cup PB. Than from that quantity of cream I keep 1/3 for the chocolate layer? Thank you!
Emily
Hi! Capital T is Tablespoon. Sorry for the confusion.
I updated the recipe for grams. Hope that helps!
The total amount of PB is a heaping half cup. You’ll mix all the peanut butter with the cream, then save some of the to mix with the chocolate.
Let me know if you have any other questions 🙂
Iulia
Thank you! Now everything is clear 🙂
Karla
Emily @ Pretty Pies you replied to my comment on Pinterest, but for some unknown reason it wouldn’t let me reply back to you in there. My comment there was that it was delicious, but the peanut butter layer squished out because it was less dense than the chocolate layer. My guess is that the cause was probably because my cans of coconut milk were VERY full of cream (like there was probably a tablespoon or two of water at the bottom instead of the usual 1/4 to 1/3 cup of water at the bottom, even though I used the same brand that I always do) so there was just more coconut milk and it made the ratio to the rest of the ingredients off a bit. And I added like twice as much chocolate to the chocolate layer because the color barely changed at all. I also had over a cup of filling left that wouldn’t even fit in the pan. So I guess I would suggest instead of saying “two cans” an actual measurement in cups might help. Thanks
Emily
Oh ok, thanks for letting me know. I will update the quantity 🙂
Carrie Lynn
Absolutely delish! This is one of our family's favorite requests. I have made it several times with the pb although for my hubby's birthday, I thought I'd try an "Almond Joy" rendition. The slight changes I made were: added a little shredded coconut to the crust. Used almond butter instead of pb. Used dark chocolate chips instead of semi-sweet. Didn't swirl the top but instead put a layer of mixed sweetened/unsweetend coconut shreds. Then used dark chocolate covered almonds to decorate edges and put his birthday # (age 43, lol!) on the top. Turned out great! My FIL's 70th is coming up and will likely make it for him, too, since he loves Almond Joy. There's the AJ version!